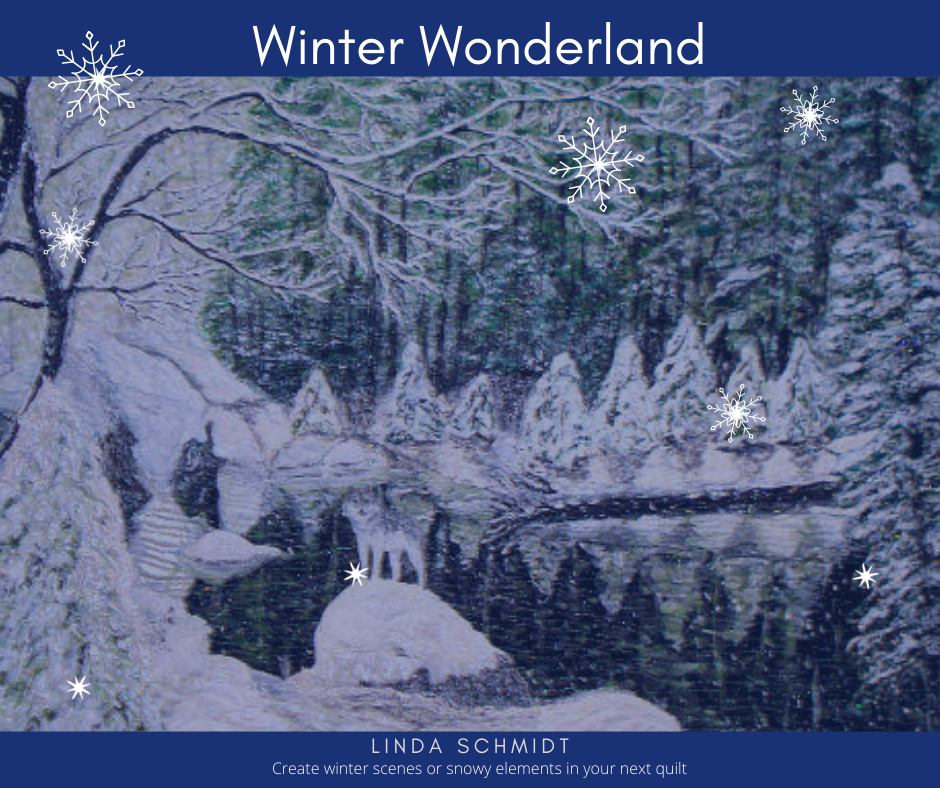
- Description
- Requirements
So, let’s be kids again, forget about how nasty winter can be, and let it snow! The purpose of this class is to show you how to make winter scenes, or snowy elements you can use in your own inimitable fashion, and have fun. To help you learn how to make the elements, you will make a 17” x 22” winter wallhanging which incorporates most of the elements I use to make a winter scene; but there are also bonus elements, such as a snow angel, a fabric Christmas tree and a snowman you may find yourself unable to resist sending to your friends.
Basically, we will be playing with puff paint, crystal glitter, iridescent glitter, fabric paint, dimensional paint, and (as an option) Lutradur. If it is snowy and near the foreground, that thing will be made with puff paint, sprinkled with glitter, let dry, puffed up, and painted again. Sometimes we’ll add more dimensional paint and glitter, and then we will push the envelope and make Lutradur or Pelon snowy leaves, but that is all there is to it. This is definitely the simplest class I have ever written, but it is very fun and even addicting. The only challenging part is painting the background for the piece, but everybody needs a challenge, eh?
Note: Once purchased, you can access the class data any time, 24 hours a day and you get immediate access. (if you don't have an account we suggest you sign up for one prior to purchase)
Time Duration applies only to teacher access for your question and answer duration.
Outline
Lesson One
- Make drawings of winter scene & tree
- Enlarge the design
- Mark the stabilizer
- Puff Painting
- Snowy pine tree
- Puff paint the black trees
- Background and foreground
- Puff your puff painted pieces
Lesson Two
- Painting the Background
- Prepare the background fabric
- Paint the First Layer
- Time for Trees
- Add Background Bushes
- Paint pine trees, snow bank, rocks and trees
Lesson Three
- Constructing the scene
- Make the frosty branches
- Add the big black tree
- Add snow with dimensional paint to branches and rocks
- Add falling snow
- Add pine tree on the left, if desired
Lesson Four
- Rip off Totally Stable
- Create a border
- Add a plain black border
- Create frosty layers
- Fuse it down
- Quilt and finish it
- Consider a focal point
- Additional projects
- Midnight Sky wall hanging with either a simple or starry background
- Snowman
- Snow Angel
Supplies Required for Workshop
The supplies for the main project are listed first with the supplies for the small wall hangings at the end, so if you need to order something special for them, you will have plenty of time to do that. Once you have completed these projects, you should be able to create your own winter wonderland scenes. These techniques are only for pieces that will never be laundered.
- 1 yard white cotton fabric - to be used as the base of your picture, preferably white Prepared for Dyeing (PFD) fabric. This is finely woven combed cotton mercerized fabric with no added sizing or chemicals, so it absorbs paint easily. If this is not available, a finely woven white cotton that has been washed in hot water and dried a couple of times will also work.Test it by flicking a drop of water on it. If the water is absorbed, then the surface is suitable for paint.
- batting and backing for a 17" x 22" project
- white acetate or satin fabric for binding, about 1/3 yard
- 17" x 22" piece of white Totally Stable
- puff paint - this is essential! You can buy one 6 oz tube of white or an assortment of different whites in small tubes. There are several brands: Allure Puff Paint, Tulip Puffy Paint, Pebeo Expandable Puff Paint or Xpandaprint.
- crystal white glitter and fine iridescent glitter such as DecoArt Glamour Dust, both available at most craft stores
- fabric paint in these colors:
- Transparent Setacolors or other fabric paints:
- Green (can be Emerald, Moss, and Turquoise or just Yellow and Cobalt Blue to mix together)
- Black Lake
- opaque Titanium White
- Perle
- If you have other fabric paints, you still need
- black
- white
- perlescent white
- 3 shades of green, but you can mix blue and yellow to get various shades of green.
- Transparent Setacolors or other fabric paints:
- Slick Dimensional Paint – White and also metallic white, one small tube of each if you can find it. Also used in Snow Angel, below.
- 70 weight Lutradur works the best. Lighter weights are harder to use without disintegrating. One sheet is fine if you are not going to make the border the way I did. If you want to make that border, you will need to get a half yard or so.
- Lite Steam a Seam II – one package if you are also going to use it for the border; one sheet if you are going to use a different border.
- black Mistyfuse – one package, available from www.EsteritaAustin.com. Alternatives are Lite Steam a Seam II painted black, glue stick or basting spray. This is for the white Lutradur border, so if you are not making this border, you do not need this, but it is very cool, nonetheless. This product is also used in the Midnight Sky project in Lesson Four.
- Thread - These are personal choices. You will be able to make your own thread choices as you work.
- Wonder Invisible thread in clear and smoke
- white metallic for snow
- iridescent sliver for lake
- silver metallic and black for trees
- black and white for general duty
- disappearing marker or pencil
- paper towels
- parchment paper or release paper from fusible webbing
- tape
- 1/4" fine paintbrush and fan-shaped paint brush
- palette or white ice cube tray for paints
- smooth plastic or glass surface to paint on
- small portable surfaces for things to dry on, such as page protectors
- apron or old shirt to protect your clothes
- spray bottle for water
- heat gun (available in most craft stores for under $15)
- sewing machine,
- size 100 Topstitching needles (from www.sewingmachinesplus.com)
- size 60 or 70 Schmetz Sharp needles
- darning foot, regular foot, open toe embroidery foot
- iron & ironing board
- design wall of some sort
- rotary cutting board, ruler, cutter
- scissors for fabric
- fine glass head pins
Fun Project Supplies
To create additional small wall hangings in Lesson Four, you will need these supplies in addition to the supplies listed above. If you want to make them into pins, you will need pin backs; if you want to make them into earrings, you will need earring hooks; if you want to make them into ornaments, you will need backings and ribbons. If you want to make them into wall hangings, you will need the items listed below but you can certainly wait awhile before buying anything.
Midnight Sky wall hanging – Simple background
- dark sky background fabric 9" x 12"
- red glitter paint
- batting, backing, and binding fabric
- one star bead about 1/2" tall
Midnight Sky wall hanging with Starry Background
- 9" x 12" piece of plain or shiny black sky background fabric
- red glitter paint
- white, perle and green fabric paint as above
- batting, backing, and binding fabric
- 9" x 12" piece of black Mistyfuse
- tiny iridescent or silver stars
- one star bead about 1/2" tall
- Interference Green or Blue Jacquard metallic paint powder
Snowman
- white puff paint
- crystal and iridescent glitter
- black fabric paint, full strength
- little fabric scarf
- background fabric, batting and binding
Snow Angel
- white background fabric
- white puff paint
- crystal and iridescent glitter
- white Mistyfuse or other lightweight bonding web or powder
- white Angelina fiber that goes under many names. All of them look white, but have names like Blaze, Aurora Crystalina, Crystal Aurora Borealis, Blue Crystalina, Violette Crystalina. You need a total of about half of one package, but if you have several white colors, use some of each. Just put "Angelina fiber" in your search engine to find sources.
- small amount of white metallic Slick Dimensional paint (used in main project)
- tiny bit of fabric paint, ink or Paintstik to color background lightly
- batting, backing and binding fabric

